Friday, September 13, 2013

All About Babies!


Welcome to the “All About Babies” Blog Hop! So glad you can join us!

If you are coming from MIRANDA'S BLOG, then you are in the right spot. If you just happened to stumble upon my site or your reading this via e-mail, please start at MIRANDA'S BLOG so you don’t miss anyone’s amazing projects!

We will be showcasing anything BABY projects! In addition to seeing some awesome projects, there is some blog candy available too!  Miranda will be giving away a Michael's or Joann's gift card.  Winner's choice!  To be eligible to win the blog candy, you must leave a comment on each stop in the hop telling us what is your favorite summer time activity!  Be sure to leave a comment on each stop because the winner can be chosen from any of the participants blogs!

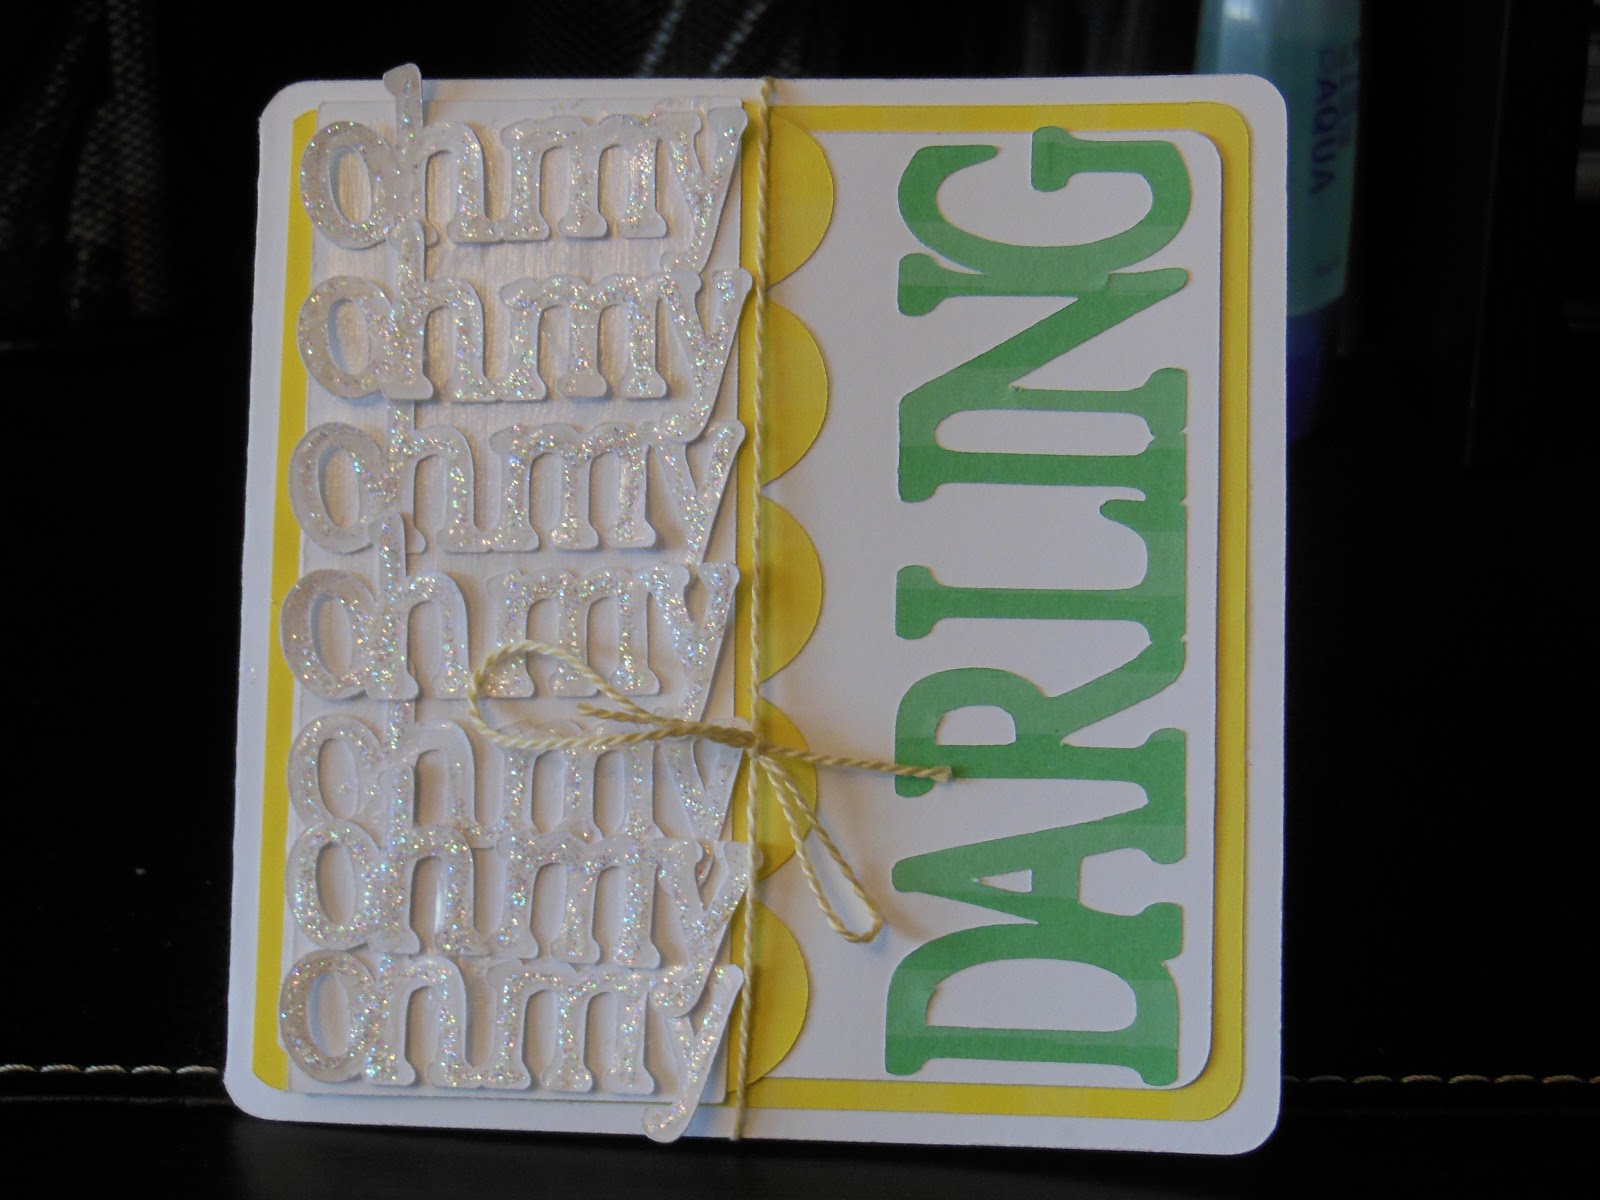
For my project today, I created the first page for my baby girl's scrapbook.

 
When I was trying to decide what to make for this hop, I think I went through every idea I have ever had about baby related items. I thought of cards, but unfortunately the only pregnant person I know doesn't find out the gender until next week. I thought of décor, but I think I have exhausted that option for my baby girl's nursery. I thought about tutu's, barefoot sandals, and lace rompers. However, I've already done blog posts including the first two, and I'm waiting about another month or so before I make Little Miss a romper. Then, it came to me. Little Miss is 4 1/2 months old, and I have yet to make a page for her scrapbook. That is crazy, right! So, I sat down and stared at all of my pictures for like an hour. I thought perhaps I needed a glass of wine because I was getting awfully mushy and sad about how fast the time had gone. :) Eventually, after a couple hours of reminiscing and a glass of wine, I created this page. What a beautiful start to her book!


Sunday, August 25, 2013

Home Preschool - Week #1

Hello everyone! I hope that you are all as happy to be here as I am. :) I have started something new this week. My little man is going to be 5 in November. Unfortunately, that is past the cut-off for him to go to Kindergarten. Taking him to Preschool isn't really an option for us because around here they are half days, and although right now I am only working 3 days that will not be the case during tax time. So, after a lot of thought, I have decided to put my experience in Daycare's and studying Early Childhood Education to use and do a home preschool with him.

I have scoured the internet (mainly Pinterest), and I have come up with lots of great ideas. We will be working on 1 letter a week, with 2 "themes" to go along with that. So, here is our schedule of activities for the first week. Our letter was "A" and our themes were "Apples" and "Ants".

Reading: Little Man and I went to the library. He searched the aisles choosing books that started with the letter "A". I also chose a non-fiction book about both of our themes for the week. So, during the week we read: Apples Apples Everywhere, Marching with the Ants, Airplanes - Soaring Diving Turning, Alphie Runs Away, The Apple Doll, The Apple Orchard Riddle, and Astronaut PigglyWiggly.

Writing: A few weeks ago I purchased an alphabet learning workbook from the store, so Little Man did the pages corresponding with the letter "A" throughout the week. We have also started practicing writing his name. He can spell and write his first name completely on his own, so now we are working on adding his last name.

Math: I used my Cricut Expression, along with the Cheerful Seasons cartridge to cut out 2.5 inch apples. I wrote the number 1 through 20 on them. Little Man first put all the numbers in order, and then we practiced our addition. I would choose 2 apples, and he would pick the apple with the correct answer on it. We also started a math journal. Once or twice a week, I will write a prompt to help Little Man's problem solving skills.


Science: Our science experiment for the week was about learning why apples turn brown. We took 3 apples slices (little man loved that he was able to eat the rest.. lol), and watched to see what happened when they were left out. We put 1 in a small bowl of water, 1 had a little lemon juice squeezed onto it, and the other had nothing. I explained that the apple is made up of different chemicals, and that when oxygen in the air hits some of those chemicals it has a reaction. The reaction is how the apple turns brown. After the experiment was done (later that evening), we discussed the differences in the time it took the apples to turn brown, and made an entry in his science journal.

Music: For music, the Little Man and I sang The Ants go Marching and This is My Apple

Arts/Crafts: Little Man made fingerprint ants and a superhero apple paper craft. He also colored a few pages with things that started with the letter "A".

Nutrition: When it was time to go to the grocery store, I decided it was a great learning opportunity. We got to the store, Little Man picked out his own little grocery cart (I love that our store has those), and he went around adding things to it that he noticed started with the letter "A". This included some items he had never had before, but he was excited to try. What a great way to get him to try new things! He had: Apples, Asparagus, Avocado, Acorn Squash, Atlantic Salmon, Arborio Rice, Animal Crackers, Apple Jelly, Apricot Mango flavored Greek Yogurt, Apple Juice, Almonds, and Applesauce.

Please keep in mind that all of these activities are spread throughout the entire week. It's been a great week, and we are excited to start week 2: Letter "B": "Balls" and "Beach"!

Dorothy

Saturday, August 24, 2013

Cupcake Birthday Card

Good evening everyone! TGIF!! I don't know about you, but I had one heck of a week. Boy was I glad to be able to sneak away into my office tonight. (Even if it was at 11pm!) Of course, this was after our shopping trip to Walmart to get 50 cent Washi. lol

Anyway, so tomorrow (or technically today I guess) is my mother-in-law's birthday. I know, I know, I was cutting it awfully short to just now be making her a card. However, please refer back to the beginning of the post. :)

I was so excited about this card. Not only did I just randomly find the coordinating paper (I'm a paper whore), but I got to use my penny Michael's pearls. Could there be a better ending to the day? I hope you all enjoy this card as much as I have!

Recipe:
Cricut Cartridges: Celebrations, Art Philosophy
CTMH Lilac ink
CTMH Birthday stamp
Pearls
Stickles

Dorothy

Friday, August 2, 2013

Simple Birthday Card

Good afternoon everyone! I hope everyone is enjoying their day. I am sitting at work, so of course I am. lol Well, I decided it was time for a new post.

I haven't been able to spend a lot of time in my office/craft room lately, so today I decided to share a card I made awhile back. My Grandmother's birthday was on Father's Day. She was the one who started my crafting journey.

I can remember as a child, I would sit with her while she was at her sewing machine. It didn't take long before I wanted to help. She was so patient with me, and she tried to teach me all about sewing. She even put me in a few sewing classes. Eventually, she taught me how to cross-stitch (which I enjoyed much more!). She tried to teach me how to crochet, but unfortunately that one didn't stick. However, I do plan on picking it back up eventually. I want to be that Grandma who crochets a blanket for my grandkids. :)

Anyway, when her Birthday was getting close, I decided it was time to make her a card. Here it is. I
hope you enjoy!

Recipe:
Size A2 cream colored card
White cardstock
4 pastel cardstock
4 different embossing folders
Chipboard accent
Ribbon
Sentiment Stamp
Ink

Dorothy

Thursday, July 25, 2013

Door Hangers/Deezy Does It

First, let me say Happy Thursday! I'm very excited both for my post this week, and being showcased on Pimp Out Your Blog from Deezy Does It. Please, if you didn't come from her site, go take a look at it. She offers a showcase once a week for someone's blog, and she always offers a prize if you link up. :)

OK, now on to my project for this week. I saw this very awesome tutorial on Pinterest for door hangers for a bedroom door. So of course, my first thought was Little Miss needed one for the nursery. I didn't want to go to the store just for a letter to decorate, so I used what I had around. Once I had finished the one for her door, my little man said he wanted one too. So together, we made his. After finishing both of them, it had only taken a little over an hour of our day, and they looked awesome! Hope you enjoy!


First for hers. I used my trusty Cricut Expression, along with the Artiste cartridge, to cut out the I. I have a light pink cardstock on the back, and the patterned one on the front. I used the cardstock as a stencil to trace the I onto 2 piece of cardboard I had hot glued together. After cutting out the cardboard and paper, I used a spray glue to coat put the paper onto the cardboard. Next, I hot-glued ribbon around the edges. I used a clear drying glue from Close to My Heart all over the front of the I, and added a dusting of clear glitter. Then I hot glued the flower embellishment and the ribbon to hand it to the door. I used a clear command hanger so that we didn't put a hole in the door. I think it turned out great!


OK, my son's was so much easier! Although he has a Cars decorated room, he wanted his W to be camo. Again, using my Cricut and the Artiste cartridge, we cut out the W from a tan and camo cardstocks. I hot-glued 2 pieces of cardstock together and after using the cardstock as a stencil, cut out our W. He got to use the spray glue to put the 2 pieces of paper on the cardboard. Since it was camo and rugged looking, he said he didn't want any ribbon on the edges, so we just hot-glued some at the top to hang it from. He also let me know that "Mommy, I am a boy and I don't need any flowers or anything on my W." So, here it is finished, and SO easy. He loves it!

Dorothy

Tuesday, July 16, 2013

Updated Bathroom


Happy Tuesday everyone! I wanted to share with you a not so crafty project, but a project none the less. :)
 
Thanks to Pinterest, we spent an afternoon updating our bathroom a few weeks ago. We took our boring old tub and wall (as pictured below), and we put Airstone on it. We went to Lowe's and purchased a box (We ended up having to get a second box because the salesman was wrong. A linear foot is NOT the same as a square foot!) of Airstone, some Liquid Nails, and a piece of trim.


Then it was time to go home and start the project. I think it took longer to decide HOW we wanted to put it on then to actually put it on. We laid it all out in our hall. Of course, our little man had to help daddy!


So, after about 4 hours and $100. This is our newly designed bathroom. We love it! It gives it such character, and really makes it look so much nicer. One of the best projects I have found on Pinterest!


Dorothy


Thursday, July 11, 2013

4th of July Fun

Happy Thursday everyone! Ok, I know that the 4th was a week ago, and I don't care. :) I want to share how my family and I spent our day. A little unconventional, yes, but it was such a great day for us. Even with the rain. For some reason, it won't stop raining for us to really enjoy a day other than for a few hours! Today is the first day in awhile it seems that it hasn't rained at some point, and here I sit at work. Some day I won't have to work, and I can enjoy beautiful days like today.
 
Enough about the negative, and back to the positive. So, little miss and I spent most of our day in the kitchen. Here she is in her Bumbo ready to direct me. :)
 
 
I tried my hand at making jam for the first time EVER. Peach jam. YUM! My grocery store was having an awesome deal on fresh peaches (99 cents a pound!), and how could I pass that up? So I came home with 6 pounds. What the hell do I do with 6 pounds of fresh peaches? Well Dorothy, you make jam of course. So I scoured the Internet to find a recipe. I finally decided on one that I had everything it called for. I peeled and cut 5 pounds of peaches. Added some fresh lemon juice and some 5 cups of sugar. Then I had to wait for an HOUR. Who can wait for an hour when this is sitting on your counter?
 
But I did. I waited the hour. Finally, it was time to put it on the stove. I brought it to a boil, and stirred. And stirred. And stirred some more. The recipe said 25 minutes to get it to the jelly consistency. 25 minutes came, and it was still liquidy. So I stirred some more. And stirred. And stirred. I gave up after 45 minutes. Obviously, this was never going to become a jelly. Next time, I will go to the store so that I can use a recipe with Pectin in it. Lesson learned.
 
However, I did end up with 3 jars of very yummy peach syrup. :)
 
Tip for you: if you have to get whatever you are canning to a rolling boil and leave it there for awhile, you don't have to do the water bath to seal the jars. Put them upside for 30-45 minutes and the heat from the jam will seal them. Then turn them over to finish cooling.
 
So while little miss and I were making jam, my son and husband had their own project. Project fire pit! My mother-in-law had given us the metal ring for a fire pit a few years ago for Christmas. Well, 2 years later, the fire pit has been taken out of the box. Hubby went to Lowe's and got some blocks to put around it, and made this on our patio. I love it. AND, it came with a pole and rack to be able to cook over the fire. Score!
 
 
Now that we have finished making the jam, I decided to use some. So once again I went onto the Internet in search of a recipe. I found this oh so yummy recipe for a peach glazed sweet and spicy salmon. I'm salivating a little just thinking about it. I mean what doesn't sound good when you are pairing sweet and spicy together? Bonus points for it only taking 15 minutes. The broccoli salad I served along side it took longer to prepare.
 
Speaking of the salad, I have finally found a salad my son will eat! Broccoli, jicama, dried cranberries, turkey bacon, and a greek yogurt dressing. He had 2 helpings! Yay for healthy food the kiddo likes. Of course, I may have fibbed and told him the jicama was a fruit, but hey, a little white lie like that doesn't hurt. Just like when I make "sweet potatoes". He doesn't need to know it is really butternut squash! :)
 
So here's our 4th of July dinner. Sweet and Spice Salmon, Broccoli Salad, and Cilantro Lime Rice.


Well, once dinner was over it was time to enjoy the evening. I'm talking a fire in the new fire pit, sparklers, poppers, and of course.. SMORE'S.


What a fantastic holiday we had. It was one of those days filled with fun, great food, and family time. A perfect day if you ask me. :)

Dorothy

Tuesday, July 9, 2013

Bow Holder

Hello everyone! Happy Tuesday! I hope everyone had a great 4th of July weekend. I know I did. I have lots of projects to post this week that I worked on during my week off work. As much as I wanted to go and spend some much needed, relaxing time on the boat, mother nature did not let that happen. It was so rainy and gross out that I STILL have yet to be out on the water this year. It is July. This is sad and disappointing. Since I just got over my fear, and learned to swim at the end of last summer (you can do it to!), I was really looking forward to that first jump into the water this year. Alas, it has slipped through my fingers, and looks like it will still be a few weeks now before it will happen. Don't you worry though.. it WILL happen soon. :)

Anyway, back to my projects. The first project I worked on was a bow holder for my baby girl. She was in DESPERATE need of one because a girl can never have too many bows. (Although, my hubby says she has plenty and I need to stop even looking at them in the store, like that will happen!) So, I scoured all over Pinterest (it only took me a few minutes to find a picture of what I wanted, but no instructions). That's ok, I don't need instructions. Well, maybe it would have made it a bit easier to do, but I can figure it out. So, if you don't want to spend a long time trying to figure out the best way to do something, here are instructions. Enjoy!

BEFORE
 
 AFTER

So, I started with a $4 picture from Goodwill. I have to say, it was an UGLY picture, but I really liked the frame. Make sure you are looking at the frame when picking one, and not the picture inside. However, also make sure that it is going to be easy to remove the picture. :)

Next, remove the picture and sand the frame down. This is when I took the "before" picture, when it was ready to be spray painted. Then spray paint. I used a paint and primer in one so I could save a step. I put on 3 coats. However, the third coat was just because I was impatient and smudged the paint while doing the next step. lol

Once the paint was (COMPLETELY) dry, I added 6 of the smallest eyelet screws I could find to the inside of the frame. I then added my wire to make 3 rows. There are 12 hook screws added to the bottom of the frame.

After adding all of the hardware, I used a (borrowed, how my husband didn't have one I'll never know!) staple gun to adhere the fabric to the back. Ok, a few tips here. I used a fabric quarter that matched my paint. I ironed my fabric first to get rid of the lines from it being folded. Also, I stapled it THEN cut off the excess. Here's my biggest tip, get help! I wish I would have. Apparently, my little girly hand was not strong enough to squeeze the staple gun with only one hand, so my fabric is not as tight as I would have liked. If I would have asked for help, I could have had my hubby stretch the fabric to make it tighter.

Lastly, I hot glued the flowers onto each corner to add some "curb appeal" to it. I LOVE how it turned out, and all it took was some time and effort.

Dorothy

Tuesday, June 25, 2013

Fabric Chandelier

Happy Tuesday everyone! I hope you have enjoyed the past few hops I have been involved in. I know I have! :) Well today I thought it was time to share an item I made for my baby girls' nursery.


I found a (somewhat) tutorial on Pinterest for a fabric chandelier, and decided that it was a MUST for above her changing table. I originally started this project while I was still pregnant, but was unable to finish it due to being put on complete bedrest at 34 weeks. Well, this past weekend I finally got around to finishing it. (Oh, and yes, those are my little boys' hand prints on the wall!) I hope you enjoy! :)


Recipe:

Cricut Cartridge - George and Basic Shapes
6 different fabric quarters
Iron
Ironing Board
Freezer Paper
Medium size embroidery hoop
Fishing Line
Sewing Machine
White thread
Tape

First, iron each of your fabric quarters. Then, cut the fabric quarters to fit onto your Cricut mat. I used my Expression, so I cut them to 12.25x12.25 inches. Next, sandwich each of the squares of fabric in freezer paper. Iron each of these as you are ready to cut with them. (I learned this the hard way. If you are not ready to cut, the paper will move from the fabric as you are cutting when the freezer paper cools.) Next, use George and Basic Shapes to cut 2 inch circles. You need 35 of each color. If you do not have a Cricut, you can use a stencil to trace the circles and cut by hand.

Next, use your sewing machine to sew your lines of circles together. I have 16 short lines, 8 medium lines, and 1 large line. The short lines have 1 of each color, the medium 2 of each color, and the large 3 of each color. Make sure that you leave extra thread at the top of each line to be able to attach it to the hoop.

Once your lines are sewn, use your fishing line tie 2 lines on your hoop in a + fashion. This will give you something to attach your 2 middle rows to. Now just tie each line to either the hoop or the fishing line. Short lines are tied to the hoop itself, middle lines to the crossing sections of the fishing line, and the large line to the center of the fishing line +.

I then tied fishing line to the hoop to make it attach to the ceiling. I just taped it up, but you can use a hook if you would like.

Sunday, June 23, 2013

Fun in the Sun!


Welcome to the Summer Time Blog Hop! You should have came from Teresa's Blog. We have a wonderful group of creative ladies on this hop, and if you haven't already make sure you start at Suzanne's Blog.

For today's hop, I made a layout for a scrapbook I am making my cousin for Christmas. He is an extremely brave and amazing young man who joined the U.S. Navy last October. I am currently working on an album of his first year. SHHH... don't tell him. :)
 
This particular page was inspired by a visit from his mom and friends to the ocean near where he is located going through school. He's studying to be a nuclear engineer! (No, I'm not proud at all! lol) I hope you enjoy!
 

Recipe:
Cardstock - Yellow, Sand, Light Blue, Orange, Purple, Green, Blue
Patterned Paper - 9 different patterns
Cricut Cartridges - Art Philosophy, Graphically Speaking, Cheerful Seasons, George & Basic Shapes, Traveler
s.e.i. Puff Alphabet Stickers in Blueberry

Start with a 12x12 sheet of yellow cardstock. Cut the sand cardstock to 11.5x11.5. Adhere it to yellow. I used my ATG tape gun. (Which I have fallen in love with!) Using my Cricut Expression, I cut Circle4 Decorative Layer from the Art Philosophy cartridge out of light blue cardstock at 10 inches, and I centered that onto the sand cardstock.

Next, cut your strips of patterned paper. Here are the sizes I cut, starting from the top: 1.5x6, .75x6, .5x6, .5x8, .5x8, .5x8, .75x6.5

Using two more patterned papers, I cut the clouds from Graphically Speaking at 2 inches and 1.5 inches. The sun is cut from Cheerful Seasons using orange and yellow cardstock at 2.5 inches. I cropped both of my photos to 4x4, and matted them on purple cardstock cut at 4.25x4.25. The circles are cut at 1.5 inches from George and Basic Shapes from patterned paper, and adhered to the back of one of the mats so that only half of each circle is showing. The shells are from the Traveler cartridge. Shell1 is cut at 1.5 inches using green and orange cardstock, and Shell2 is cut at 2 inches using purple and blue cardstock.

Arrange all of the items onto your background and adhere accordingly. Add your title, and ta-da, you have an awesome summer layout!

Don't forget about the awesome grand prize worth $60 donated by Zannie Berry Scrapbooking. Make sure to leave a comment and follow all of the stops on this hop to be entered in a chance to win these awesome items!


Here is the lineup. Make sure to check out each stop!

Sunday, June 16, 2013

Happy Father's Day!

Happy Father's Day everyone! I hope that you are all out there enjoying this day. I know it is beautiful here! We have spent most of the day outside, and we will be back out there to grill in a little bit. I wanted to share with you a few more Father's Day cards I made. I kept one simple for my husband's 93-year-old grandfather, and the second is for my dad.

My dad is very special to me. We have had our ups and downs. We have laughed, cried, and had some knock-down drag-out fights. I wouldn't change anything though. I can tell my dad anything, and I know that I will always get his honest opinion. He has helped make me the person I am today, and I am so grateful for that. So Happy Father's Day daddy, love your little girl with little blonde girls. :)

Ok, back to the crafting. Today, both of my cards were made a little bit easier thanks to a Facebook group I am part of. There is an AMAZING group of crafty women on Facebook that swaps Cricut cuts based on themes. Both cards have a die-cut that was from a Father's Day swap I was part of last year. I hope you enjoy the projects!

Recipe:
Size A2 card
Pattern Paper
Die-cut sentiment
4 rhinestones

Recipe:
Size A2 card
Green cardstock
Patterned Paper
Twine
Ribbon
Chipboard pennant
Die-cut

Dorothy

Friday, June 14, 2013

Summer Blog Hop!


Welcome to Our Kreative Karma Blog Hop!
 
We are celebrating Summer, Graduations, Vacations, Reunions, Out of School fun!! How do you celebrate? We hope our projects will give you some inspiration! And we're offering some prizes along the way!!
 
I decided to show you a few of my Father's Day cards. The first is the card to my husband from me, and the second is the one from our kids to my husband. I hope you enjoy!
 
David is what you would call a guy's guy. If you think of the kinds of activities associated with men, he would enjoy them. One of his favorites though is fishing. Shocker, right? The Camping Critters cartridge for my Cricut is one of my favorites. I decided to put it into action for his card. :)
 
Recipe:
Cricut Cartridges: Camping Critters
Sentiment: You're a great catch! from My Pink Stamper
Ink: Outdoor Denim from Close to My Heart
 
Here are the deminsions for the 6x6 card:
5 7/8 x 5 7/8 dark brown
5 3/4 x 5 3/4 cream
4 1/8 x 5 5/8 white
4 x 5 1/2 striped paper
5 5/8 x 1 5/8 white
5 1/2 x 1 1/2 dots paper
The lake is cut at 3.5 inches
The deer is cut at 3 inches
 
Project number 2: I asked my son what he wanted on his dads Father's Day card. His answer, Buzz Lightyear. YIKES! I hate doing the Disney/Pixar characters. So many small (as in TEENY TINY) pieces. Well, together, we put together this card. :)
Recipe:
Cricut Cartridges: Toy Story, Father's Day
 
Here are the deminsions for the 6x6 card:
5 7/8 x 5 7/8 blue
5 3/4 x 5 3/4 green
1 7/8 x 1 7/8 white (3)
1 1/2 x 1 1/2 brown, purple, red
3 1/2 x 5 1/2 white
3 3/8 x 5 3/8 striped paper
Buzz is cut at 2.5 inches
Happy Father's Day is cut at 3 inches


Our sponsor this month is

Janet is a Close To My Heart Dealer and she's put together this great prize package for our Grand Prize winner! How do you win? Comment on every Blog in our hop! Be a follower of all blogs in the hop,if you aren't already! There are some pretty crafty hoppers here, and you don't want to miss out on their awesome projects. Be sure to follow and comment on Our Kreative Karma's blog as well. We all rotate posting on that blog and you never know when we'll do something that just might surprise you! It'll always be a friendly spot! Now for that grand prize photo!

Awesome huh? Over $50.00 in creative Summer fun for you to document those fun summer activities you love!
This hop takes place over two days! So plenty of time to visit all the blogs, and there's not too many each day that you have to be rushed! So grab a cold drink and hop to our fun ideas for the summertime!

Start here on both days:

Day 1 

2. Lisa             http://desileedesigningdivas.blogspot.com/
3. Janet            http://janetscreativeworld.blogspot.com/
4. Jodie            http://jodiescraplab.blogspot.com/
5.  Marji          http://stampaholic.blogspot.com/
6. Dorothy       http://scraphappyinohio.blogspot.com

Stop back by the Karma blog and tell us what you thought of today's projects! Any faves??
7. Karma         http://ourkreativekarma.blogspot.com/

Day 2

8. Christina  http://cema1cema.blogspot.com/
9.  Susie  http://scrappyrandomness.blogspot.com/
10. Tess Hilton- www.sassycricutcrafting.com/
11. Jessica Douglas Wilson- www.craftinandstampin.blogspot.com/

Stop back by the Karma blog and tell us what you thought of today's projects! Any faves??
12.  http://ourkreativekarma.blogspot.com/

A winner will be drawn on Monday! So to be eligible-make sure you've visited every blog and left a comment and be a follower of Our Kreative Karma blog as well as our hop stops this weekend! Thank you and be sure to leave a way to contact you if you win! Follow the individual blogs rules for any blog candy they offer please! We appreciate your spending some time with us this weekend! Hope to see you back soon!

Dorothy

Tuesday, June 11, 2013

Welcome Baby and Thank You card

Hello everyone! Long time no see. First, I would like welcome my new baby girl, Isabella, to our family. She is absolutely perfect, and the best final addition to our little family I could ask for. She is an amazing blessing to our lives. I can't wait to start scrapbooking her journey. :)


Ok, back to what you are all here for.. crafting. I made a few thank you cards for some gifts given to us after Isabella was born. I made the cards size A2 using tan card stock. I added a peach colored paper embossed with my Texture Boutique, some flowers with peach pearls added to the center, a tan and brown ribbon, and stamped the sentiment using Cocoa ink. I hope you all enjoy, and I am so happy to be back! :)


Dorothy


Monday, March 25, 2013

Baby Shower Card

Happy snow day!! Ok, I don't know where you are reading this from, but I am writing it from my living room while there is 6 inches of new snow on my front lawn. I am taking a break from making a chandalier for the nursery (post to come as soon as it is finished!) to post a card I made for my sister to give her best friend for her baby shower. She is pregnant with her first little one, a girl who she is going to name Clementine (absolutely adorable right!). So, here is the card I made. Enjoy!


Ok, I'm sorry. I made this a few weeks ago, and I didn't write down what cartridges I used. I apologize. I can't give you a "recipe" for this one, but I still hope you liked it! :)
 
Dorothy

Friday, March 22, 2013

Hoppy Easter!

Hoppy Easter everyone! I know, I know, I'm a just a little early. I'm very excited though because today I am part of the Easter Blog Hop hosted by Vanessa at Paper Krafts Unlimited. If you didn't come from her blog, make sure you start your hopping with her. :) Ok, now on to my project, an Easter card.

 
Cricut Cartridge: Celebrate with Flourish
Cardstock: Yellow, Grey, Light Green, Pink
Patterned Paper: Happy Easter
Ribbon: Felt Orange Flowers
Stickles: Pink, Yellow
Black Marker


Next, you should visit SUZANNE.

 Blog Candy
Close To My Heart Vanessa Toro Independent Consultant is giving away $10.00 worth on CTMH products.

Follow me on 
Follow My Blog and you will be entered for the giveaway.

Scraptastical Kreations


 Scraptastical Kreations is giving a Gift Card for $10.00 worth of files
Be sure to follow Scraptastical Kreations on Facebook and mention 
You came from the "Easter blog Hop"
 

Here is the complete line up in case you get lost along the way


Dorothy

Wednesday, March 20, 2013

WINNER!

Ok, first let me apologize for the delay. I know that on my post for the 100 Cartridge Blog Hop I said I would post the winner of my blog candy on March 16th. I forgot. :( BUT, I am posting it today! So, per random.org, which picked comment #4, congrats goes to YVONNE MORENTIN! Please email me at scraphappyinohio@gmail.com with your address, and I will get your blog candy sent out. Congrats again!

Sunday, March 17, 2013

Wild Baby Shower

Today, I was able to spend a wonderful afternoon with 2 very special friends of mine. My friends Kendra and Shelby are throwing me a baby shower. Since we don't know if we are having a boy or girl, we are going to have a jungle themed shower. Of course, I couldn't just have them purchase invites, so I designed them instead. Today we spent the afternoon putting them together. Hope you enjoy them. We definately enjoyed creating them together!


Cricut Cartridges: George and Basic Shapes, Create-a-Critter
Cardstock: Dark Brown, Green, Tan, Orange, Yellow, Black, Dark Grey, Light Grey, Light Pink, Medium Brown
Patterned Paper: Zebra, Giraffe, and Cheetah prints
 
All 3 designs have the following instructions:
Cut the dark brown at 5 inches by 7 inches with my Fiskars paper trimmer. Cut the green at 4.75 inches by 6.75 inches. Print on the information on the tan and cut at 4.5 inches by 6.5 inches. Cut a strip of patterned paper at 1 inch by 5 inches. Using my Cricut and George & Basic Shapes cartridge, I cut a circle in dark brown at 2 inches, and a circle in green at 1.75 inches. Using my ATG, I assembled the invitations. Lastly, I attached the elephant, monkey, and giraffes. See below for the directions for each of the animals.


For the giraffe, I used my Cricut Expression and Create-a-Critter cartridge. Cut the giraffe at 1.5 inches using dark brown, orange, and yellow cardstock. I used a black marker to emphasize the eyes and mouth.


For the monkey, I used my Cricut Expression and Create-a-Critter cartridge. Cut the monkey at 1.5 inches using dark brown, medium brown, and tan. I used a black marker to emphasize the eyes.


For the elephant, I used my Cricut Expression and Create-a-Critter cartridge. Cut the elephant at 1 inch using black, dark grey, light grey, and light pink cardstock. I used a black marker to emphasize the eyes.


Dorothy

Sunday, March 10, 2013

100 Cartridges Blog Hop

Happy Sunday everyone, and welcome to the My Cricut Craft Room 100 Cricut Cartridge Blog Hop! I hope that everyone is doing well out there today. I know I am doing better than the rest of this week. Today I am involved in my very first hop. I'm very excited about it.
 
 
You should have come from Cicily. If you just hopped in to my blog, and would like to start at the beginning, please click HERE.
 
For my projects today I am using the following carts:
Art Philosophy
Artiste
Create-A-Critter
Outdoor Man
Teddy Bear Parade
 
William's 1st Camping Trip 2-Page Layout using Outdoor Man


Cricut Cartridges: Outdoor Man
Patterned Paper: Imaginisce
Cardstock: Coredinations Foundations in Hunter, Green Bean, Coffee, Gold, and Orange; The Paper Company in Primary Yellow; Worldwin Papers in Dark Outdoorsy Olive
American Crafts Precision Pen in Black
 
Images cut from Outdoor Man:
Tent (page 44, detailed) - Cut at 2.5 inches using Coffee, Hunter, and Dark Outdoorsy Olive cardstock
Campfire (page 39, detailed) - Cut at 3 inches using Gold, Coffee, Orange, and Primary Yellow cardstock
Happy Campers (page 24, phrase & shadow) - Cut at 3.25 inches using Hunter, Dark Outdoorsy Olive, and Green Bean cardstock
Boys Trip (page 20, phrase - first layer only & shadow) - Cut at 2.5 inches using Dark Outdoorsy Olive and Green Bean cardstock
 
All mats behind the pictures are Hunter cardstock cut with a paper trimmer.
 
 
Simple Easter Card using Art Philosophy and Teddy Bear Parade


Cricut Cartridges: Art Philosophy, Teddy Bear Parade
Patterned Paper: MME Moments
Cardstock: Coredinations Foundations in Coffee, Gold, Pastel Pink, Nutmeg, and Snowcap; Unknown in Black and Grey
Sentiment Stamp: Studio G "Easter Blessings" wood stamp
Ink: Close To My Heart in Cocoa
 
Images cut from Art Philosophy:
Oval3 (page 42, card) - Cut at 6 inches using Snowcap cardstock
Oval4 (page 52) - Cut at 3.75 inches using MME Moments patterned paper
 
Images cut from Teddy Bear Parade:
Bear - Cut at 3 inches using Black, Coffee, and Nutmeg cardstock
Easter Bunny - Cut at 3 inches using Grey, Pastel Pink, Nutmeg, and Coffee cardstock
 
Diaper Card using Artiste and Create-A-Critter


Cricut Cartridges: Artiste, Create-A-Critter
Cardstock: Coredinations Foundations - Pastel Pink, Snowcap, and Green Bean; Worldwin - Medium Luscious Lime; Unknown: Black and Hot Pink
Ink for Sponging: Close to My Heart in Olive
Sentiment: American Traditional Designs Lil' Mesages Vellum Stickers "Welcome Baby"
Yellow/White Ribbon
 
Images from Artiste:
V (page 64, card shift) - Cut at 4.75 inches using Medium Luscious Lime card stock
V (page 64, card) - Cut at 4.75 inches using Snowcap cardstock
V (page 64, accent1) - Cut at 1.25 inches using Pastel Pink cardstock
 
Images from Create-A-Critter:
Flower2 (page 47) - Cut at 1.25 using Black, Hot Pink, Pastel Pink, and Green Bean cardstock
 
Thanks for taking the time to stop by. I just love sharing my projects and hope that it gives you a little inspiration today.
 
I am also offering a little blog candy for you in addition to the blog candy being offered by Erica. :) All you have to do is become a follower of my blog and leave a comment on this post! That is it. I will randomly pick a winner and announce on March 16th. Good luck!

Your next stop in this hop is Erica's Projects. Below is a list of the entire lineup.


Dorothy